PermissionsTo create and manage requirements, the
Admin role is required.How requirements work
- Event creators select requirements from the slotlist that have been enabled for the respective event type.
- Multiple requirements are AND-linked: participants must fulfil all selected requirements to be able to register.
Creating requirements
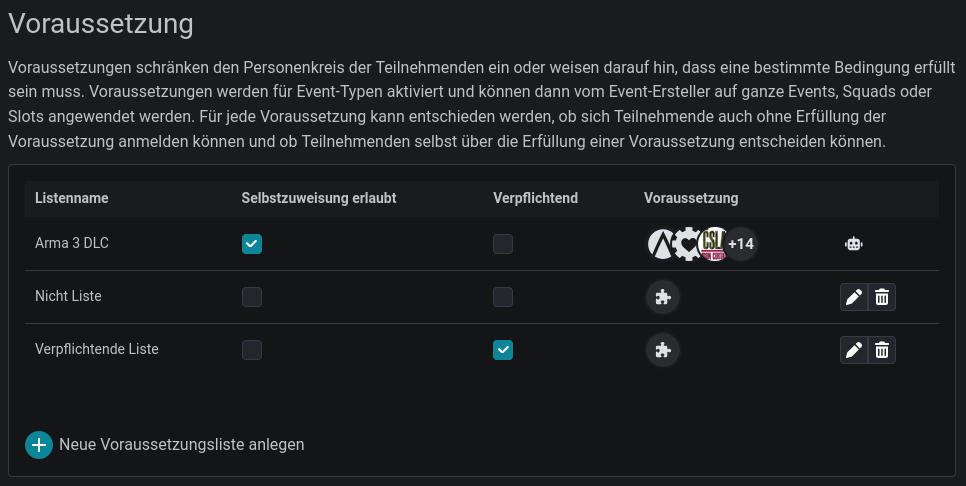
Open the Community Administration and scroll to the Requirements section. Requirements are organised in lists so you can group related criteria together.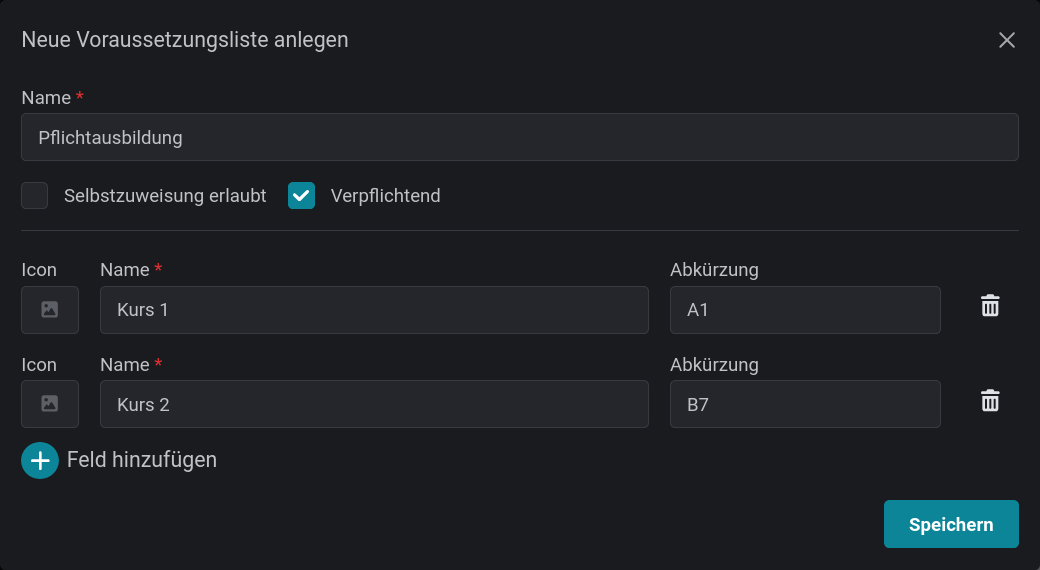
List settings
For each list, you define two properties in addition to the name:1. Who manages the fulfilment status?
- Self-assignment allowed (participants themselves): Participants indicate which requirements they fulfil when registering. This is saved and remembered for next time.
- Community Administrators: Admins manage fulfilment in the member management.
2. Mandatory or just a hint?
- Mandatory (Blocker): If one of these requirements is missing, registration is blocked. (Not every requirement needs to be fulfilled, only those selected for the slot.)
- Not mandatory (Hint): Participants only receive a hint but can still register.
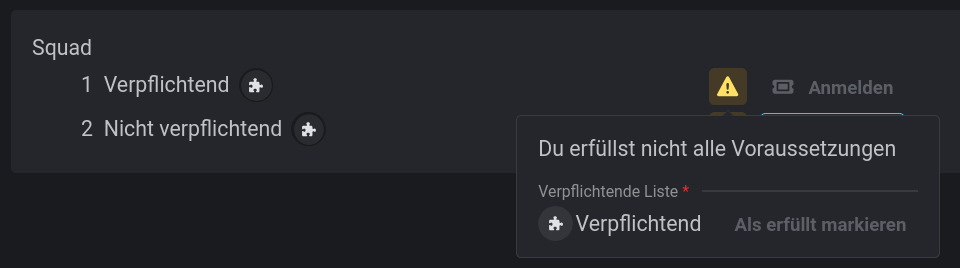
Mandatory requirement
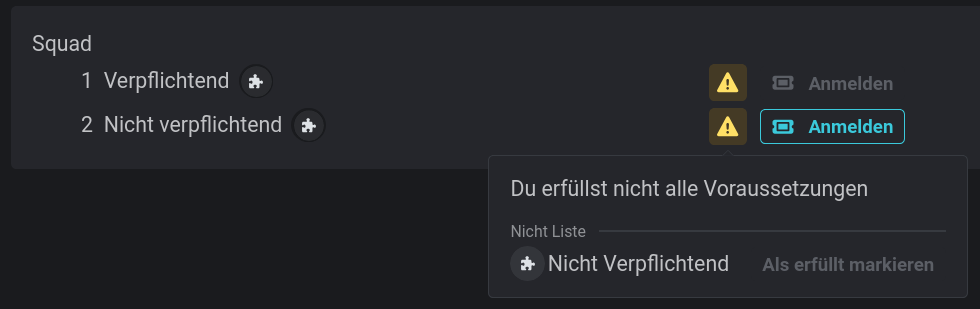
Non-mandatory requirement
Requirements: Name, abbreviation and icon
Each requirement needs at least a name. Optionally, you can provide an abbreviation. This is used in places with limited space, for example in the Discord output of the slotlist. Icons make requirements recognisable at a glance. You can optionally upload a second icon for light backgrounds.Using requirements in events
To give event creators a clear selection to choose from, you enable requirement lists specifically for certain event types. Stay in the Community Administration and switch to the Event Types heading. Select an event type and click the icon in the row.